


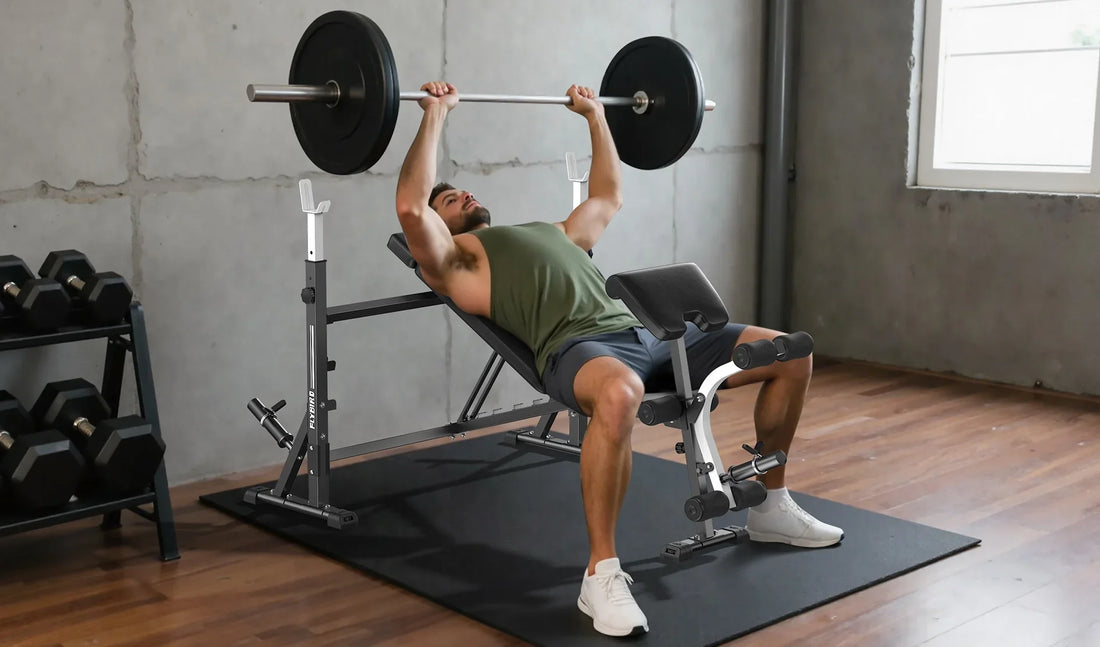
How to Properly Bench Press: A Step-by-Step Guide for Beginners
The bench press is one of the most rewarding lifts you can learn. When you're starting out, though, the hard part isn't moving big weights — it's learning to set it up properly, control the bar, and press it through the right path every rep.
The weight follows once those are in place.
This guide breaks the movement into eight clear steps, covers the setup and safety you need, and walks you through the beginner details that decide the outcome: grip, breathing, starting weight, and the mistakes to avoid.
Learn it properly now, and you'll have a far more solid foundation to add weight to later.
How to Properly Bench Press Step by Step
Here's the movement broken into eight repeatable steps. Practice them in order with a light weight until each one feels automatic, because good habits built now will carry you for years.
Step 1: Lie Down and Position Yourself on the Bench
Lie back so your eyes are roughly under the bar. Then set what lifters call the five points of contact: the back of your head, your shoulder blades, and your glutes all pressed into the bench, with both feet planted firmly on the floor.
This stable base is the platform for everything that follows.
Step 2: Set Your Shoulder Blades
This is the step beginners skip most, and it matters more than any other. Pull your shoulder blades together and down, tucking them toward your back pockets, and keep them pinned there for the whole set.
This "retracted" position builds a stable shelf to press from and keeps your shoulders in a stronger, safer spot.
Step 3: Set Your Grip
Grip the bar roughly one and a half to two times your shoulder width. Let the bar sit in the heel of your palm, stacked over your forearm bones rather than up in your fingers, and wrap your thumb fully around it.
Never use a thumbless grip, since a bar rolling back toward your face is exactly the danger you want to avoid. A wider grip emphasizes the chest, while a narrower one brings in more triceps.
Step 4: Brace Your Body and Set Your Feet
Plant your feet flat with your shins close to vertical, squeeze your glutes, and brace your core as if you're about to take a light punch.
A small, natural arch in your lower back is normal and fine, as long as your glutes stay on the bench. This full-body tension is what turns your body into a stable spring.
Step 5: Unrack the Bar
Take a breath, brace hard, and lift the bar out of the hooks with straight arms. Move it out and hold it directly over your shoulders, not over your face. Take a beat to steady it and confirm your shoulder blades are still tucked before you begin the first rep.
Step 6: Lower the Bar With Control
Lower the bar under control toward your lower chest, letting it drift slightly down and forward as it descends. Keep your elbows tucked to somewhere around 45 to 70 degrees from your torso rather than flaring them straight out to the sides.
Touch your chest lightly, and don't rush it. Control on the way down is what protects your shoulders and sets up a strong press.
Step 7: Press the Bar Back Up
Drive your feet into the floor, push your chest up into the bar, and press it up and slightly back toward your shoulders. Exhale through the hardest part of the rep. Finish with your elbows locked out and the bar stacked over your shoulders, right where it started.
Step 8: Re-Rack the Bar Safely
Don't relax the moment you finish your last rep. Press the bar back toward the uprights, feel it touch the posts, then lower it into the J-hooks.
Confirm it's seated securely in both hooks before you let go. More accidents happen during careless re-racks than most people realize.
What You Need for a Safe Bench Press
Before you touch a bar, three things need to be sorted: a solid bench, a properly set barbell and rack, and a plan for safety, whether that's a spotter or the right equipment. Nail these and the lift itself becomes far less intimidating.
This is the foundation, so it's worth a few minutes of setup. Let's go through each piece.

FED Fitness Flybird Series WB10 Olympic Adjustable Weight Bench With Leg Extension
- 900 lbs Maximum Weight Capacity
- 8 Adjustable Backrest Positions
- Leg Extension, Leg Curl & Preacher Curl
Choose the Right Bench
Your weight bench needs to be stable, firm, and rated well above your bodyweight plus the load you'll press. A wobbly bench kills both your confidence and your power, so this isn't the place to cut corners.
For pure barbell pressing, a sturdy flat bench is all you need, and the FED Fitness Foldable Flat Weight Bench gives you a stable pressing base that folds away after use.
If you want the option to train incline and decline angles too, an adjustable model is the smarter long-term buy.
The FED Fitness Adjustable Weight Bench offers a full flat-incline-decline range with an 800-pound capacity, while the more compact FED Fitness Adjustable Utility Weight Bench folds down small for tight spaces without giving up versatility.
Whichever you choose, make sure the pad is firm and wide enough to support your shoulders.
Set Up the Barbell and Rack
Position the J-hooks so you can unrack the bar with a nearly straight arm, without having to shrug or overreach to lift it out. Set too high, and you'll strain to unrack; set too low, and you can't get the bar out at all.
A standard Olympic barbell weighs 45 pounds, or about 20 kilograms, which is where many people begin.
If that's too much to start, there's no shame in using a lighter training bar or dumbbells to learn the pattern first. Load any plates evenly and double-check they're secure before you lie down.
Do You Need a Spotter?
A spotter is the gold standard for heavier sets, since they can help you unrack, guide a grinding rep, and rescue you if a lift fails. If you train with a partner, use them.
But plenty of people bench alone, and you can do it safely with the right setup. The key is a power rack with adjustable safety pins or arms, which we'll cover in detail later.
The short version: never put yourself in a position where a failed rep can trap you under the bar with no way out.
What Is the Bench Press, and What Muscles Does It Work?
The bench press is a horizontal pressing lift: you lie on a flat bench and push a loaded barbell from your chest to arm's length. It's a compound movement, so it trains your chest, shoulders and triceps together rather than working one muscle at a time.
Your pectoralis major does the heaviest work, backed up by the anterior deltoids at the front of your shoulders and the triceps on the back of your arms.
Your lats and upper back stay busy too, holding the bar on its path, and your legs anchor you to the bench.
That's a lot of your upper body working at once, which is why one lift tells you so much about how strong you are.
The angle of the bench changes which part of that gets worked hardest.
Researchers at the University of Almería measured muscle activation across five bench angles in 30 trained lifters and found the mid and lower chest work hardest on a flat bench, while the upper chest peaks at around 30 degrees of incline.
Push past 45 degrees and your front delts start taking over the lift at your chest's expense. The triceps were the constant — roughly the same activation at every angle tested.
Also, it’s worth knowing what that study can and can't tell you.
It measured electrical activity at 60% of each lifter's one-rep max, not muscle growth over months, and trained lifters were the subjects rather than beginners. It's good evidence for where to point the effort.
It isn't proof that a 30-degree incline builds a bigger upper chest than a flat bench does.
And grip changes things as well. A narrower grip shifts more of the load onto your triceps, which is why close-grip benching gets programmed as a triceps builder.
That range is part of what makes the bench press so valuable. It's a full upper-body pushing pattern, and it carries over to everyday strength and to nearly every other pressing exercise you'll do.
How Much Weight Should Beginners Use for the Bench Press?
Start light enough to master the movement, which for most people means the empty barbell or less. Form comes first, weight comes later, and rushing that order is how beginners stall or get hurt.
The empty 45-pound bar is a common starting point.
If that's too much, you've got options: a lighter training bar, an empty barbell of a smaller size, or a variation that's easier to control while you learn — dumbbell bench press being the obvious one.
Just know the dumbbell version isn't the same movement. It's a useful way to build pressing strength and confidence, but each arm works independently, and the bar path is yours to define, so you'll still need to learn the barbell setup properly when you come to it.
The real target isn't a number; It's a weight you can control for clean, full-range reps.
From there, progress slowly.
When you can complete all your reps with stable, correct form, consider adding a small amount of weight (usually around five pounds in total), which means 2.5 pounds a side.
Some sessions you won't add anything, and that's fine. If you're already near the edge of what you can control, forcing weight on top of that is how form falls apart.
This steady approach is called linear progression, and it'll keep working for months before you need anything more complicated.
How to Breathe During the Bench Press
Take a breath and hold it before you lower the bar, keep that braced pressure through the descent and the hardest part of the press, then exhale near the top. Holding your breath makes your torso rigid, which helps you press more safely and powerfully.
That braced breath-hold, sometimes called the Valsalva maneuver, is standard practice among lifters because it stabilizes your whole midsection. For a beginner with lighter weights, even simply bracing and not exhaling too early will do the job.
Just a quick note: holding your breath under load briefly raises your blood pressure.
For most healthy people, that's not a concern, but if you have any heart or blood-pressure issues, talk with your doctor first and consider lighter sets with steady, continuous breathing.
This is general guidance, not medical advice.
Common Bench Press Mistakes to Avoid
Most bench press problems come down to a few repeat offenders. Fixing these will make your lifts safer and your progress faster almost overnight.
Using Too Much Weight
Ego is the beginner's biggest enemy. Loading more than you can control wrecks your form, cuts your range short, and raises your injury risk. And if your technique falls apart, the weight's too heavy, full stop.
Bouncing the Bar Off Your Chest
Using a chest bounce to heave the bar up isn't strength, it's momentuUsing a chest bounce to heave the bar up is momentum doing the work rather than your chest, and it puts a sharp load through your sternum.
Lower under control, touch lightly, and press from a dead stop.
Where Should the Bar Touch Your Chest?
The bar should come down to your mid or lower chest, roughly level with your nipples or just below — not up toward your throat.
Touching high near the collarbone forces your elbows to flare and puts your shoulders in their weakest, most exposed position, and it's a much harder place to press from.
To check this: at the bottom of the rep, your forearms should be vertical when viewed from the side, with your elbows stacked under your wrists. If your elbows are behind the bar, you're touching too low. If they're out in front of it, you're touching too high.
But the exact spot shifts from person to person, and anyone telling you there's one correct inch is overselling it.
Arm length, torso length, shoulder width and grip width all move the touch point around.
A tall lifter with long arms and a wide grip will touch lower and travel further than someone short-armed pressing with a narrow grip.
Find the point where your forearms come up vertical at the bottom and your shoulders feel stable rather than stretched, and that's yours.
Letting Your Elbows Flare Excessively
Elbows flared out to 90 degrees put stress on your shoulders. Keep them tucked to that 45-to-70-degree range instead. It's both safer and stronger.
Losing Shoulder Blade Position
If your shoulder blades unpinch and roll forward mid-set, you lose your stable base and your shoulders take the hit. Set them before you unrack and keep them locked the entire time.
Lifting Your Hips Off the Bench
Driving your hips up to grind out a rep turns your flat press into an unstable decline and defeats the purpose. Keep your glutes on the bench throughout.
Moving Your Feet During the Lift
Happy feet, shuffling and repositioning mid-rep, rob you of leg drive and a solid base. Plant them at the start and keep them still.
Cutting the Range of Motion Short
Stopping the bar inches above your chest might let you lift more, but it shortchanges the muscle and builds false confidence. Touch your chest on every rep and press all the way to lockout.
How to Bench Press Safely When Training Alone
Benching solo is completely doable, but only with the right safety net. A power rack with adjustable safety pins is your best friend when there's no spotter around.
Set the safety pins or arms just below where the bar touches your chest. That way, if you fail a rep, you can lower the bar onto the pins, slide out from underneath, and walk away unbothered. It's the single best habit for solo lifters.
If you don't have a rack with safeties, do not use collars on the bar.
It sounds backwards, but if you ever get pinned, you can tip the bar to one side and let the plates slide off to free yourself, which is impossible with collars locked on.
And whenever you train alone, leave one or two reps in reserve rather than grinding to total failure. Dumbbells are another great solo option, since you can simply drop them to the sides if a press stalls.
How to Improve Your Bench Press Over Time
Consistency and small, steady increases beat any secret program. Bench twice a week, add weight gradually, and support the lift with the right accessory work and recovery.
Linear progression, adding a little weight each session, will carry a beginner a long way. Train the bench press about twice a week with at least two days between sessions, so your muscles have time to recover and adapt.
Beyond that, a few things quietly accelerate progress: strengthening your triceps and upper back, doing some incline pressing, eating enough protein, and sleeping well.
When your session-to-session jumps finally stall, that's your cue to move to a slightly more structured program. But don't rush there. Most beginners leave months of easy gains on the table by chasing complexity too soon.
Final Takeaway
The bench press rewards patience and good technique more than raw effort. Set your body up properly, move the bar with control, breathe and brace, and respect the safety basics, and you've got a lift that will build serious upper-body strength for years to come.
Start light, focus on the eight steps until they feel natural, and add weight gradually. Master the fundamentals now, and everything else - more weight, more confidence, better results, follows from there.
Now load up that empty bar and get to work.
Frequently Asked Questions About the Bench Press
How Often Should Beginners Bench Press?
Twice a week is the sweet spot for most beginners, with at least two days between sessions to recover. That frequency gives you enough practice to sharpen your technique and enough stimulus to build strength, without overloading your shoulders and chest.
Should the Bar Touch Your Chest When Bench Pressing?
Yes. Lowering the bar to lightly touch your lower chest gives you a full range of motion, which trains the muscles through their complete length.
Just touch, don't bounce. A controlled touch and a strong press beat a short, half-rep every time.
Flat Bench Press vs. Incline Bench Press: Which Should Beginners Do?
Learn the flat bench first. It's the version most programs are built around; it's the one you'll measure your progress against, and it trains your chest most evenly.
Mid and lower pecs work hardest at a flat angle, with the upper chest peaking at around 30 degrees of incline instead.
Incline is worth adding once the flat press feels automatic, usually a few months in, and it earns its place as a second pressing movement rather than a replacement for the first.
Set the bench too steep, and you'll find your front delts taking the lift over from your chest.
How Wide Should My Bench Press Grip Be?
A good starting point is about one and a half to two times your shoulder width. From there, adjust for comfort and how your elbows track.
A wider grip leans on the chest more, a narrower grip involves the triceps more, and the right width lets you keep your elbows in that safe 45-to-70-degree range.
Should My Back Be Flat During the Bench Press?
A small, natural arch in your lower back is normal and helpful, and your glutes should stay planted on the bench.
You don't need to force the big arch you see competitive powerlifters use. As a beginner, keep it modest and comfortable while staying tight through your upper back.
Can I Bench Press Safely Without a Spotter?
You can. Use a power rack with safety pins set just below chest height, or press with dumbbells you can drop if needed.
If you're on a bench with a barbell and no safeties, skip the collars so you can tip the bar free in an emergency, and always leave a rep or two in the tank.
References
- Stronger by Science. "How to Bench Press: The Definitive Guide." Stronger by Science.
- Rodríguez-Ridao, D., et al. "Effect of Five Bench Inclinations on the Electromyographic Activity of the Pectoralis Major, Anterior Deltoid, and Triceps Brachii During the Bench Press." International Journal of Environmental Research and Public Health, 2020.
- StrongLifts. "How to Bench Press with Proper Form." StrongLifts.
- Barbell Logic. "How to Breathe While Lifting (Valsalva Maneuver)." Barbell Logic.
- Art of Manliness. "Bench Pressing Without a Spotter: 4 Rules to Do It Safely." Art of Manliness.
- StrengthLog. "Bench Press for Beginners: A Complete Starter's Guide." StrengthLog.
This content is for informational purposes only and does not constitute medical advice. If you have questions about your health or a medical condition, please consult your physician. Always seek guidance from a qualified healthcare professional before starting any exercise program or fitness routine. FED Fitness assumes no responsibility for any consequences resulting from the use of this information.


Leave a Comment
We’d love to hear from you — your insights can inspire others!